Getting Started
This is the mechanical path — click here, run this, see it work. Every step below has a screenshot of exactly what you should see, so if your screen doesn’t match, stop and re-read that step before moving on. For the why behind the stack and the ground rules for using AI on this project, see Using This Template.
1. Create your repo
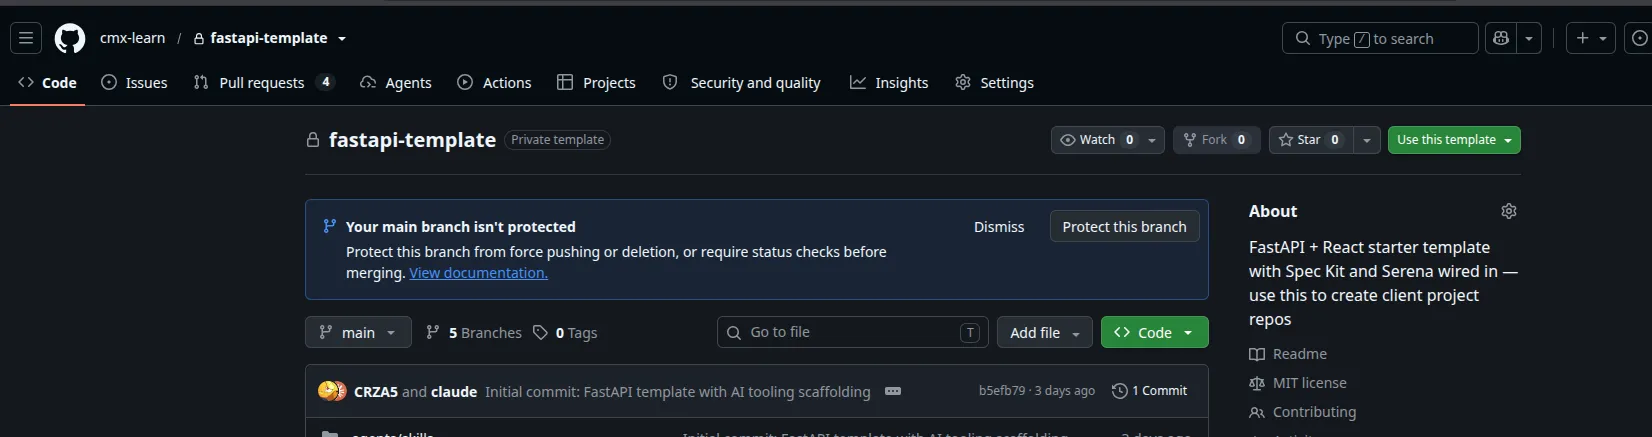
Section titled “1. Create your repo”On cmx-learn/fastapi-template, click the green Use this template button and choose Create a new repository. This gives you your own repo with clean history, not a fork — you won’t accidentally open PRs back to the original template, and the AI won’t either.
You’ll land on GitHub’s normal “Create a new repository” form, except it’s pre-filled with the template as the source. Give it a name (anything — the client/project name is fine), leave visibility as Private unless you have a reason not to, and click Create repository.
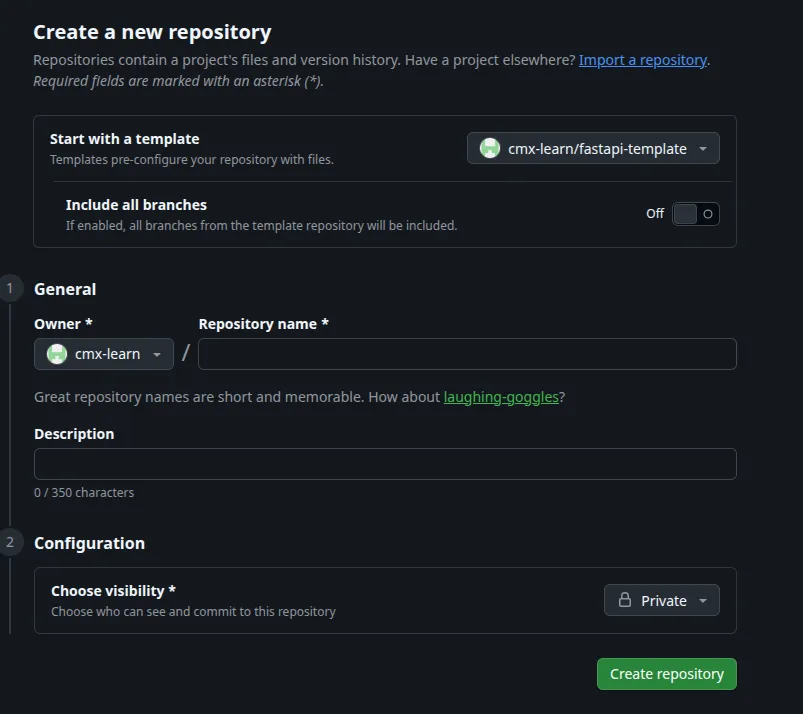
Wait a few seconds — GitHub is copying every file from the template into your new repo.
2. Open it in Codespaces
Section titled “2. Open it in Codespaces”You’ll land on your new repo. It looks almost empty at a glance, but it has every file the template has — just with one fresh “Initial commit” instead of years of the template’s own history.

Click the green Code button, then the Codespaces tab, then Create codespace on main. This is the moment nothing gets installed on your own laptop — the entire dev environment (editor, terminal, both toolchains) builds in a container on GitHub’s servers and opens in your browser.
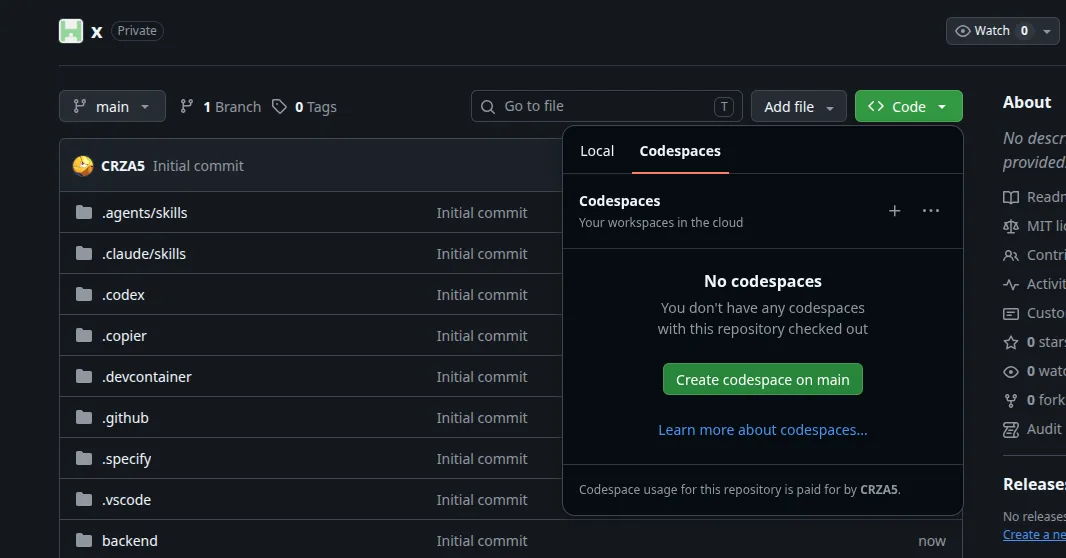
A new tab opens with a loading screen (“Setting up your codespace…”). That’s normal — leave it, it takes a minute or two the first time.
3. Trust the folder
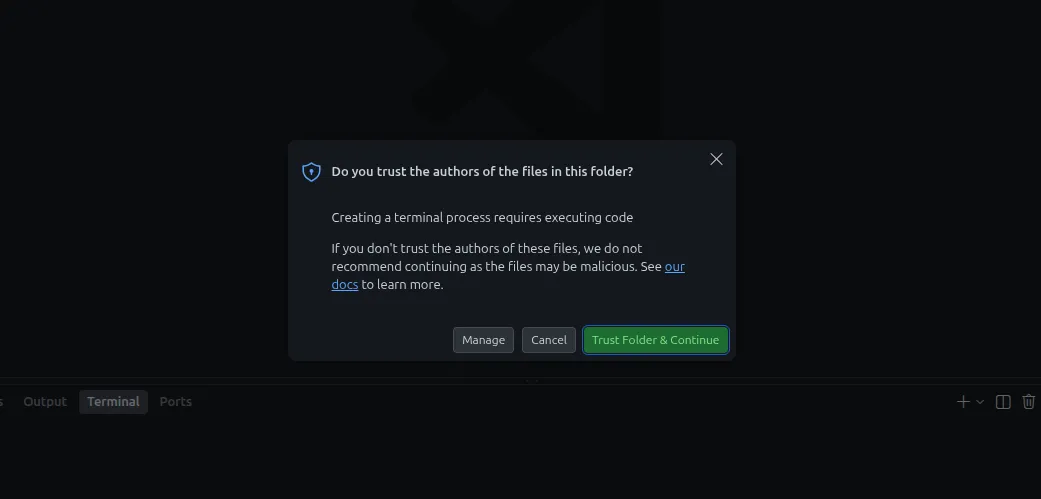
Section titled “3. Trust the folder”Once the editor loads, VS Code asks whether it trusts the authors of the files in this folder — a generic warning it shows for any workspace it hasn’t seen before, template or not. It’s your own repo, so click Trust Folder & Continue.
4. Wait for setup to finish
Section titled “4. Wait for setup to finish”Right after that, a postCreateCommand kicks off automatically in the terminal panel at the bottom of the screen: it installs uv (Python), bun (JavaScript), Claude Code, and Codex CLI, then runs uv sync and bun install to pull down every package this project needs. You’ll see it log each step as it happens.
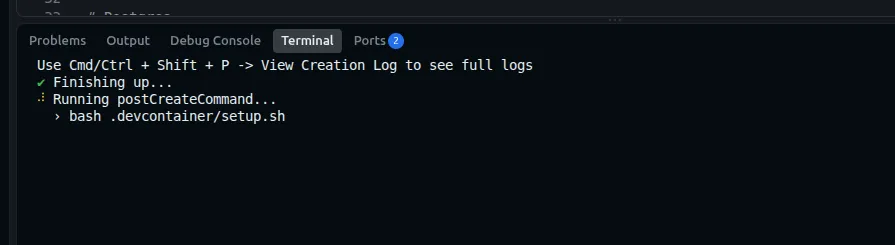
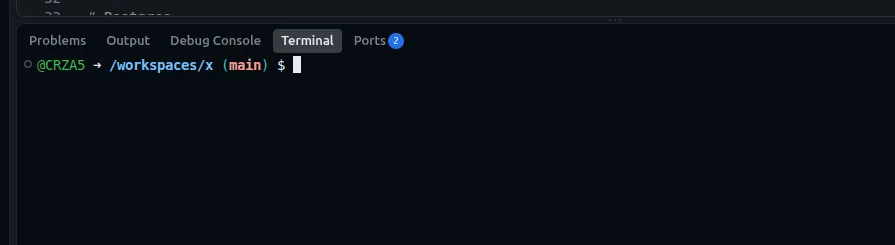
That prompt is your signal: both AI CLIs and both toolchains (uv, bun) are installed and ready to use, right now, in that same terminal. GitHub’s free tier (120 core-hours/month, ~60 hours on the default 2-core machine) is enough to get started on — no billing setup needed yet.
5. Set your values
Section titled “5. Set your values”Look at the file explorer on the left. Setup also ran uv sync, which created a .venv folder — that’s your confirmation everything installed cleanly. Scroll down and you’ll spot .env.example sitting at the project root:
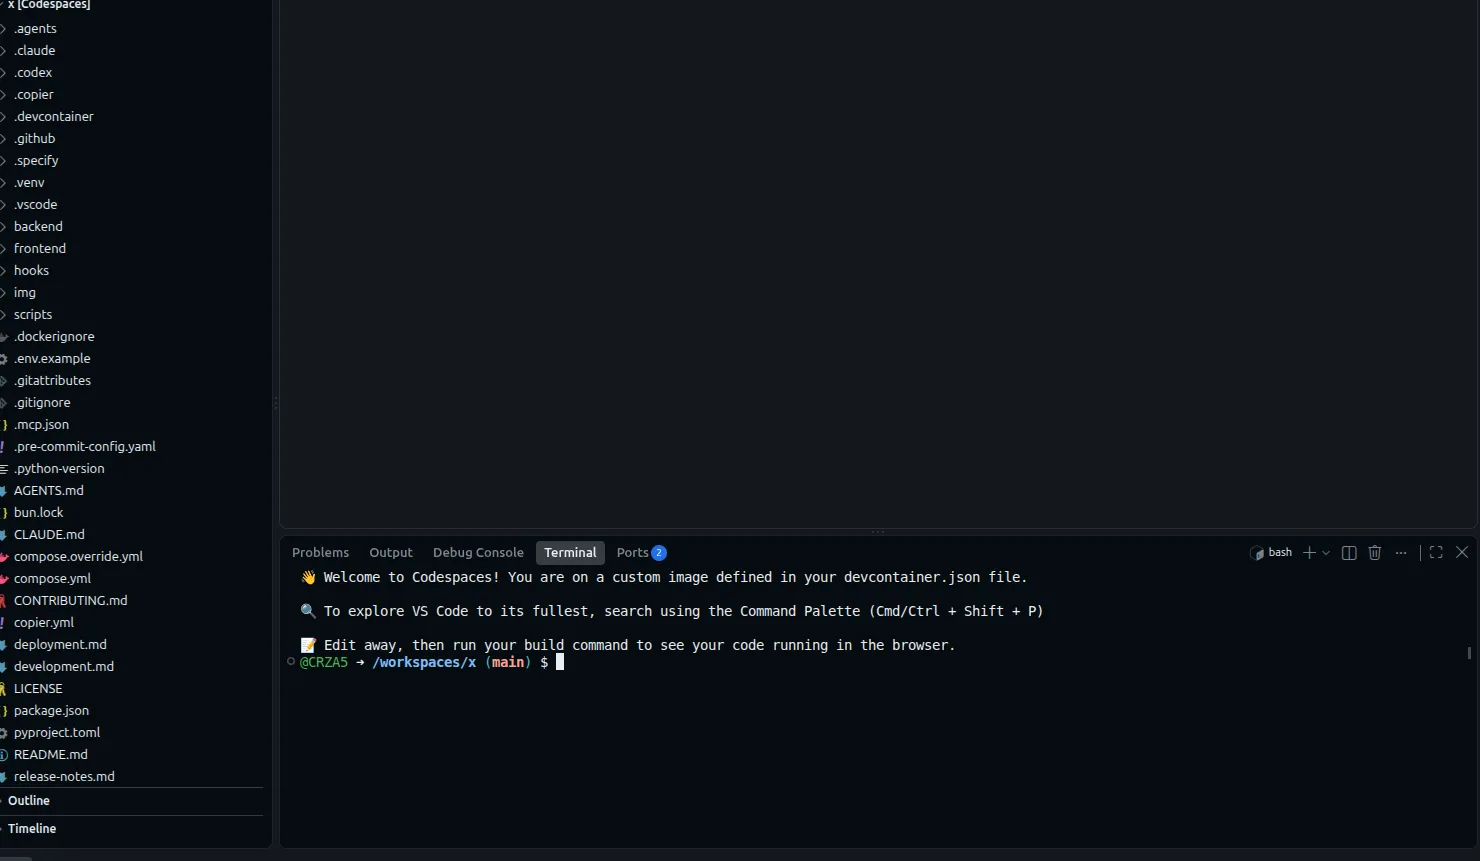
This file lists every setting the app reads, with safe placeholder values — it’s checked into the repo so anyone can see what to set without seeing real secrets. Copy it to a real .env file, which is where the app actually reads from:
cp .env.example .envClick .env in the file explorer (a new file, separate from .env.example) to open it, and edit these values directly in the editor:
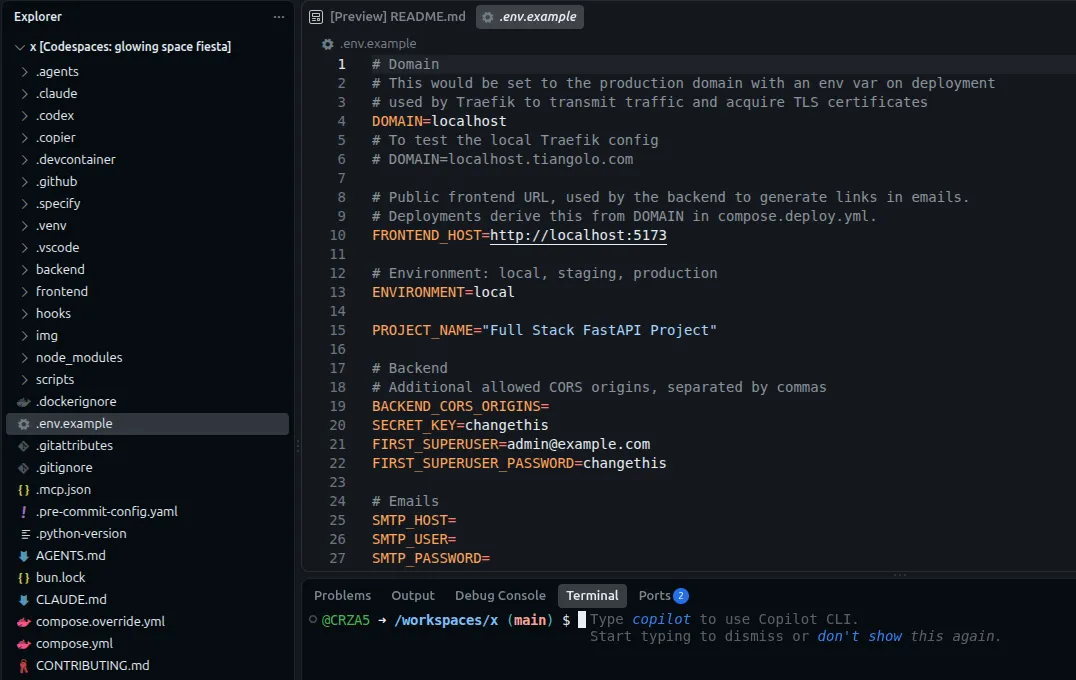
| Variable | What to put |
|---|---|
SECRET_KEY |
Any random 32+ character string — signs your login tokens |
FIRST_SUPERUSER / FIRST_SUPERUSER_PASSWORD |
The email/password you’ll actually log in with |
POSTGRES_* |
Your Aiven database credentials — see Database Setup |
SMTP_* is optional — leave it blank for now and come back once you actually need password-reset emails to send. Full explanation of every variable: Environment Variables.
6. Run the first migration
Section titled “6. Run the first migration”The database has no tables yet:
cd backend && uv run alembic upgrade head7. Point the frontend at the backend
Section titled “7. Point the frontend at the backend”Running both dev servers separately means the frontend (port 5173) and backend (port 8000) are different origins — without telling it otherwise, the frontend calls itself for API requests and every request 404s. Point it at the backend’s forwarded Codespaces URL:
echo "VITE_API_URL=https://${CODESPACE_NAME}-8000.${GITHUB_CODESPACES_PORT_FORWARDING_DOMAIN}" > frontend/.env8. Start both dev servers
Section titled “8. Start both dev servers”You need two terminals open at once — one per server, both stay running the whole time you’re working. Open the first one (it’s probably already open from setup), and split it: click the split terminal icon in the top-right of the terminal panel (or Ctrl/Cmd + Shift + 5). You now have two side-by-side terminal panes.
In the first pane, start the backend:
cd backend && fastapi run --reload app/main.pyWait for it to print something like Application startup complete. — that’s Uvicorn (the server FastAPI runs on) telling you it’s live and listening on port 8000.
In the second pane, start the frontend:
bun run devWait for Vite’s version banner and a line like Local: http://localhost:5173/. Both servers now need to keep running — don’t close either pane or press Ctrl+C in it, just leave them and open a third terminal (the + icon) if you need to run other commands later.
9. See it live
Section titled “9. See it live”As soon as the frontend starts, Codespaces should pop up a notification in the bottom-right: “Your application running on port 5173 is available.” Click Open in Browser on that popup.
If you miss the popup (or dismissed it), open the Ports tab next to the Terminal tab at the bottom of the editor. You’ll see rows for 8000 and 5173 — hover over the 5173 row and click the globe/browser icon that appears, or right-click it and choose Open in Browser.
A new browser tab opens pointing at your forwarded frontend URL (something like https://your-codespace-name-5173.app.github.dev) — and you should see this project’s login page. That confirms two things at once: the frontend built and is serving, and it’s not just a blank page or a build error.
10. Log in
Section titled “10. Log in”On that login page, enter the FIRST_SUPERUSER email and FIRST_SUPERUSER_PASSWORD you set in .env back in step 5 — that account is created automatically the first time the backend starts up, no signup step needed. Submit the form and you should land on the app’s dashboard/items view, logged in as that user.
That’s the whole loop working end to end: your repo, your codespace, your database, your backend, your frontend, in the browser, live. Everything from here is building on top of this, not getting it running in the first place.
11. Start building with AI
Section titled “11. Start building with AI”Run claude or codex in a third terminal — leave the two dev servers running in the others. Both CLIs are already wired to Serena and Spec Kit at the project level — nothing left to configure. Start with Spec-Driven Development for how to kick off a feature (including a full worked example), and Code Navigation with Serena for what to ask it.